Home » Articles posted by Keiran Kelley
Author Archives: Keiran Kelley
Mold Removal – How to Effectively Remove Mold From Wood
Mold loves wood; its high cellulose content provides it with ideal feeding conditions. Though most types of wood mold are harmless, it is best to treat it quickly and effectively using a few simple household items. Contact Mold Removal Salt Lake City for professional help.

Baking soda is a natural, affordable cleaning product that can be used to clean both hard surfaces and fabrics. It can help kill mold and remove stains, and it can also neutralize odors by absorbing moisture. It can be combined with water to form a paste for deep cleaning of stubborn stains and spots. Baking soda is effective as a mold removal product because it changes the pH of the surface, making it inhospitable for mold. It is also mildly abrasive, so it can physically scrub away mold from surfaces. Baking soda can even absorb some of the moisture that fosters mold growth, reducing the dampness and stopping mold from returning quickly.
To use baking soda as a mold remover, first prepare the solution by mixing one tablespoon of baking soda with water in a spray bottle. Then, apply the solution to the affected area and scrub it with a brush. After scrubbing, rinse the area and wipe it dry. You can also add a few drops of essential oils to the solution to make it smell nice and to provide antifungal properties.
Using baking soda as a mold remover is an effective and safe method for removing mould stains from most materials. However, it is not as effective at killing airborne spores and preventing future outbreaks as a specialist chemical product or a professional mould cleaner. It is also less effective on porous materials such as drywall and concrete, where it does not penetrate deep enough to kill the roots of the mold.
Other natural mold removal options include vinegar and hydrogen peroxide, both of which are effective at killing mold spores and bleaching fabrics and surfaces. However, they are more likely to damage surfaces than baking soda, and their strong odors can be an unpleasant problem for some people. Moreover, they are not as effective as baking soda at removing mold stains and do not lighten them as well. Commercial mould removers can be effective, but they are often expensive and contain chemicals that may be harmful to people with sensitivities or environmental concerns.
Vinegar
Bleach is a household staple and has a multitude of uses for cleaning, but it can be harsh when used on certain surfaces and in specific situations. Vinegar, on the other hand, can be an effective and cheaper alternative. It can kill mold and remove stains on nonporous surfaces such as walls and painted furniture. This is because vinegar contains mild acidic properties that can effectively eat away at the microscopic surface of the mold, killing it and eliminating spores. It is also much safer to use than bleach and can be used on more porous materials such as carpets.
To get started, gather the necessary equipment and materials including white vinegar, an empty spray bottle and a scrub brush. Remember to wear protective gloves and a mask to avoid breathing in any mold spores, especially when scrubbing. It is also a good idea to open a window and turn on the bathroom or kitchen exhaust fans to help ventilate the space you are working in.
Start by spraying the moldy area with undiluted white vinegar, ensuring that it is well coated. Allow it to sit for at least an hour to give the vinegar time to penetrate and kill the mold. Once the surface has been thoroughly saturated, you can then begin scrubbing it with a scrub brush. If you find that the vinegar is not strong enough to deal with the stubborn stains, try mixing it with baking soda or borax. However, you should note that while vinegar is effective at removing most types of mold, it does not destroy mycotoxins and so should not be used on contaminated surfaces.
For an extra boost, you can also add essential oils such as eucalyptus or a blend of citrus oil and lavender to the vinegar solution to make it smell less unpleasant. This may also be helpful if the vinegar is not strong enough to remove all of the mold spores from the wall. Be sure to rinse and wipe down the wall once you have finished cleaning and allow it to air dry.
HG Mould Remover Spray
HG Mould Remover Spray immediately destroys fungus and algae in damp areas, inside and out. This black mould cleaner has a special foam formula, which gives it better staying power and longer working time, as well as a milder fragrance and is easier to spray directly on the mould/mildew, without splashing. This makes HG mold remover spray ideal for the cleaning of tiled walls (also suitable for marble) and grouting in the bathroom, shower, toilet, kitchen, cellar, basement, sauna, swimming pool, garage, shed, etc. HG mold spray also cleans facades, balconies, plant boxes and garden ornaments (excluding wood).
This powerful black mould killer kills the spots that other cleaning products can’t reach, such as the unsightly brown marks caused by fungus around the bathtub or on shower cubicles. It is also extremely effective on UPVC window frames and UPVC tiles and grouting.
Mould forms when there is moisture in the wall and can damage the wall, furniture and even cause health problems. The best way to prevent the formation of mould is to regularly ventilate the home, particularly after cooking, showering or sleeping. Ventilation ensures that moist air is discharged outside and fresh air is brought in. This also helps to reduce unpleasant smells and create a healthy living environment.
Mould is a dangerous and unpleasant substance that can have serious consequences for your health. This is why it is important to keep the mould at bay with regular use of a reliable cleaning product. Baking soda and vinegar are popular DIY tips for removing mould, but they are not the most effective solution. For the best results, always use a product that has been specifically developed for removing mould and has been officially approved for this purpose. This will guarantee that you get a truly impressive result, resulting in the complete elimination of all the mould. This will make your house look fresh and clean again, leaving no traces of unwanted black or grey mould spots on the walls. And this will certainly leave your guests with a good impression.
Specialist Treatments
Mold is a common household fungus that thrives in warm, damp environments. While it often appears as a discolored stain, large infestations can be extremely harmful to your health. To ensure the safe and complete remediation of your home, consider hiring professional mold experts.
Specialists follow a meticulous process for testing, containment, and cleaning that is far superior to DIY methods. They begin by assessing the area for mold growth and identifying its source of moisture. They also test air and surface samples using laboratory analysis. This data helps them determine the type and concentration of mold spores present, allowing them to tailor a specific treatment plan. They then isolate affected areas to prevent the spread of spores during the cleanup process.
During this stage, specialists use physical barriers and negative air pressure to create a contained environment. This is important because mold spores can become airborne, and if inhaled, may cause serious health issues. Specialists will also use HEPA vacuums and air scrubbers, which are designed to capture microscopic spores.
Once the affected areas are isolated, they will then use a commercial-grade biocide or antimicrobial spray to kill all the mold spores in the space. This is then followed by a thorough cleaning of non-porous surfaces, such as tiles, metals, bathtubs, and sink cabinets. Then, they will use an antifungal agent on porous materials like wooden wall studs.
This method is a lot more comprehensive than trying to remove mold with a DIY cleaner, as it eliminates all the spores instead of just containing them. In addition, it reduces the chances of the mold returning by identifying the underlying moisture issue. It also saves you the cost of buying unnecessary products and avoiding costly repairs and replacements. This is a great way to protect your family’s health and the safety of your home in one swoop!
What You Need to Know About Roof Repair
A damaged roof is an open invitation for moisture to enter the home and cause significant damage. As time passes, water damage can lead to mold, fungus, and mildew.
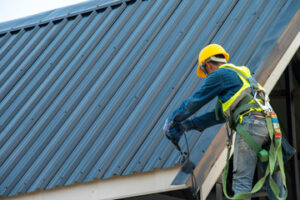
When it comes to roof repair, the most important factor is recognizing issues early. Once problems are identified, the next step is determining whether a repair is possible. Contact Ellingon Roofing LLC for professional help.
As your roof’s first line of defense, shingles are essential for keeping water out of your home. If damaged shingles aren’t repaired quickly, they can weaken the rest of your roof and lead to moisture infiltration and those pesky ceiling leaks. Thankfully, damaged shingles are often the first sign of trouble and can be easily fixed with some roofing cement and new nails.
When a shingle is damaged, it’s important to inspect the area thoroughly. Check for cracks, holes, and rips. Be sure to also examine the surrounding shingles, as they may be loose or have been affected by the same weather conditions that caused your damaged shingle.
If you discover a shingle with a hole or a large crack, you’ll need to replace it with a new one. To do so, start by loosening the shingles above it with your pry bar. Next, firmly lift up the shingle you wish to remove and expose its nails. Using your pry bar again, gently but firmly work under and around the nail to dislodge it from the shingle.
Once you’ve removed the damaged shingle, install the replacement and secure it with roofing cement. Be sure to use a color that matches the surrounding shingles for a seamless look.
You can repair a shingle with a small crack by placing a thick bead of roofing sealant under the cracked surface. After applying the sealant, press down the shingle and smooth it out with your putty knife. To camouflage your repair, check the gutter for an accumulation of colored granules that have washed down the roof from the damaged shingles and sprinkle them over the sealant to mask your repair.
Loose or missing shingles can affect your roof’s ventilation, which is crucial for air circulation and moisture control. Check for sagging, uneven or bubbling paint as well, which are signs of inadequate attic insulation and/or ventilation. Ultimately, if you notice a lot of missing or loose shingles, it’s best to consult with a professional to have them evaluate the damage and determine whether you need to replace the entire roof or not.
Damaged Flashing
Flashing is a thin, protective material that’s used during roof construction to connect seams around different installations on the roof like chimneys, vents and skylights. It also helps eliminate the chances of water damage to the interior of your home around these installations. Flashing is typically made of copper, galvanized steel or aluminum and is very important to the overall health of your roof.
Flashing can become damaged from a number of reasons, most commonly due to weather conditions or physical damage. If the flashing has a hole or a section is missing, it’s a good idea to have it replaced right away. One or two small leaks from a damaged flashing area may not cause much damage, but as the leaks expand and spread throughout your roof they can be very expensive to fix.
A roof repair professional can replace a section of your flashing by carefully removing the old section and then putting in a new piece that’s properly sized and overlapped to create a watertight seal. The replacement piece can be made from a variety of materials, but copper and galvanized steel are the most durable.
The best way to spot flashing damage is to get up into your attic or crawl space and visually inspect the area. The most common signs of flashing damage are rust spots or corrosion, as well as holes and dents. It’s a good idea to do this on a regular basis, especially after any severe weather events.
Another way to spot damage is to look for water stains on the ceiling or walls. If you’re noticing these areas in your house, it’s likely because of a leaky roof and damaged flashing.
It’s possible to do some minor repairs to your own roof if you have a little experience. However, any extensive or complicated repair jobs should be left to the professionals. Doing a job that you’re not familiar with can lead to serious and costly damage, as well as pose a significant safety hazard for you and your family. It’s always worth having a professional take a look and recommend the proper course of action for your repair needs.
Damaged Built-Up Roofing (BUR)
BUR roofs have a reputation as being some of the most durable commercial roofing systems. They can withstand some of the harshest weather conditions and can last for up to 30 years when properly maintained. However, these thick layers of felt, asphalt and gravel can still be damaged from the elements and other factors.
If your BUR roof is damaged, a professional should be contacted to perform repairs. A repair on a BUR roof should include removing any materials that are not firmly attached and then preparing the area for the new patch. This preparation includes removing any debris, aggregate and dirt from the area of the damage. It also includes thoroughly cleaning the area.
Once the area is cleaned, a bitumen membrane patch should be installed. This can be done by using a hot application process or cold installation method. This will ensure the patch is sealed into place. It is important to note that a hot bitumen patch can melt or burn the adjacent material, so this type of repair should only be performed by a trained and certified commercial roofing contractor.
When a BUR roof is damaged, it may develop blisters or waves that protrude from the surface of the roof. This is typically caused by damp, swollen or contaminated layers of the roof. In order to repair this, your contractor will remove any swollen or damp layers and then add more felt, asphalt cement and chippings on top of the damaged areas.
Another common problem with BUR roofs is bare spots in the surface flood coat. This is often caused by erosion or by a lack of maintenance. To fix this, a contractor will cut away any bare spots from the surface and then replace them with fresh aggregate.
A major advantage of a BUR roof is that it is able to hold up to more physical abuse than other single-ply roofing systems. This is because it has many layers and a high puncture resistance. Because of this, it is much less likely that your BUR roof will experience accidental penetrations that can cause costly leaks.
Leaks
One of the most common issues a homeowner will encounter is roof leaks. Leaks can lead to a number of problems, including damp and mold, rotted framing and sheathing and damaged ceilings. If you suspect your roof is leaking, it is important to get it repaired right away to avoid water damage and potential structural problems.
There are a few things you can do to help locate and repair a leak in your roof. First, if you have a water stain on your ceiling, you should try to identify the source of the leak before it gets worse. If you can, take a flashlight to the attic and shine it over the area of your roof where the water spot is. This will allow you to see any areas where the roof deck is exposed, and you can then check for water stains or rotted wood.
Another way to find a leak is to use a hose to “make it rain.” Have someone inside the house keep an eye out for where the drips appear, then go up on the roof with a garden hose. Start low, soaking the area just above where the leak appears in your home, then move up the roof a little bit at a time. Ask your helper to yell when a drop shows up, so you can pinpoint the location.
Many roof leaks are caused by shingle seams that aren’t sealed properly. These seams are usually located in areas where two planes of the roof come together, such as around chimneys and dormers. The sealing may have been done improperly in the beginning, or it may have cracked over time due to weather and wear and tear.
To seal these leaks, your roofer will break the seal and lift the shingle up. They’ll then apply an ice and water shield to the underside of the shingle, and reseal it. They’ll also apply a new strip of underlay to prevent moisture from coming up through the joint.
If your roof is leaking, you should limit the damage by moving any furniture or belongings you can to safe areas of the house. If you’re able, cover them with tarps or buckets to protect them from water and mold.
Understanding Household Plumbing Systems
Understanding your home’s plumbing system is important. It will help you reduce the risk of plumbing emergencies and understand how to repair them yourself when they occur.
Despite its complexity, Plumbers In Berea Ohio adheres to nature’s basic laws of gravity and pressure. In this article, we’ll explore two subsystems that carry fresh water into your home and drain wastewater away: water supply systems, and drainage systems.

Water Supply System
The water supply system delivers fresh water into your house and gets wastewater away. It’s a series of pipes, valves, and fittings that deliver running water to every tap in your home, hot showers, washing machine, outdoor spigot, toilet, and more. It’s important to know the basics of your plumbing so you can understand how it works and help a plumber fix problems.
Your freshwater comes into your house under pressure via the humongous pipe, called the main pipe, that runs parallel to your street. From there, it goes through a meter that registers how much you use and then into your house to reach the faucets and appliances that need it. There is usually a shutoff valve right before and after the meter, which allows you to stop the flow of water should the need arise.
Depending on your setup, you may have a direct cylinder system or an indirect cylinder system. Indirect cylinder systems are more common in older properties, where a large cold water tank is fitted in the loft and heated by a combination boiler. These tanks are prone to leaking and take up valuable space, but they can be cheaper to run than direct cylinders.
To get the most out of your plumbing, you need to understand how it’s balanced between two subsystems – the water intake and the drainage system. Both systems follow basic laws of nature, including gravity and the principle that water seeks its level.
Drainage System
Your plumbing system’s drains are responsible for taking wastewater away from your house. It’s a separate system that doesn’t use pressure but relies on the natural slope of your home’s pipes to move wastewater out of your fixtures and into a sewer line or, if you live in a rural area, a septic tank.
Just like the water supply system, the drainage system is comprised of pipes, valves, and fixtures. These parts work together to create a well-functioning drain system, also called the drain-waste-vent (DWV) system. Pipes, for instance, are usually made from PVC or copper. The materials chosen for your plumbing system affect how well your system functions. PVC pipes are lightweight, easy to work with, and highly durable. Copper, on the other hand, is more expensive and requires soldering to join its components.
As water moves through your pipes, it’s carried to fixtures like sinks, toilets, and washing machines by a series of valves and fittings. Each fixture has a drain, which is where wastewater flows once you’ve finished using it. The drains are shaped to hold water, forming a trap that keeps sewer gases from seeping into your home. The angled pipes that lead out of your trap are called vents.
The drain system also includes a waste pipe, which carries waste into the sewer line or, in rural areas, the septic tank. The vents allow air to enter the pipes to keep water flowing properly, and they’re also used to prevent wastewater from backing up into your house. If your drains aren’t used often enough, their traps can dry up and create a backflow that causes sewage odors to enter your home. To avoid this, you should pour water down your drains every once in a while to refill the traps.
Fixtures
The plumbing system comprises two distinct systems that bring clean water in and take waste out. Each of these is a separate set of pipes, but they share a few common components. Understanding the basics of how plumbing works will allow you to troubleshoot problems more effectively and maintain your home’s pipes, fixtures, and appliances.
The water supply system is the piping that brings in fresh water from your home’s municipal or private water source. It carries water at 50 to 60 psi of pressure, which is enough to move your water from the source to any room in your house. It also carries your household electrical appliances like washing machines, dishwashers, and electric water heaters.
While your water supply system is pressurized, the drainage system relies on gravity to carry wastewater out of your home. The drain line from each fixture (like a sink, shower, or toilet) connects to horizontal branch drain lines concealed within your walls. These drainpipes have curved sections known as traps that prevent wastewater and foul gases from rising back up into your home. The drain line then flows into the main sewer or septic tank.
The drain-waste-vent system is one of the least visible parts of your plumbing, but it’s also one of the most critical. Without it, your home’s sanitation would be compromised by sewage and wastewater seeping back up through faucets, showers, and toilets. The vent system consists of capped vertical pipes that connect each fixture to the drainage line and allow air to enter the pipe, maintaining proper pressure. It also allows sewer gases to escape. Most vents also feature an air chamber that cushions the impact of sudden turn-offs to fixtures, preventing the water hammer that can damage pipes and fittings.
Water Meter
Water metering is a system that measures your household water usage and charges you per cubic foot or 7.48 gallons of water consumed. It’s the only system that accounts for all of your water use and gives you accurate information about your monthly bill.
The freshwater subsystem pushes water under pressure through pipes to supply your upstairs fixtures, and the wastewater subsystem transports your used water away from your house. Your water meter is the heart of this system, and understanding how it works will help you save money on your next utility bill.
When water enters your building, it passes through your water meter, which spins a built-in device to measure the amount of water used. Each full rotation of the dial on a standard meter represents 1 cubic foot of water or 7.48 gallons. The water meter also has a sweep hand to display the current total water usage. Modern meters typically have a digital display with odometer-style wheels that add to show your usage.
To read your water meter, turn off all indoor and outdoor water-using devices like toilets, faucets, irrigation spigots, and icemakers. Then, observe the meter and record the numbers displayed. If the number indicated by the sweep hand is moving, it indicates a continuous leak. If the number is not moving, it’s an indication of no water flow and you’ll need to call a plumber.
If your meter has an indicator, it’s important to learn how to read it, as this will help you understand your bills and identify any problem areas quickly. A typical water meter displays two different numbers: the meter reading and the flow rate. The meter reading tells you how many cubic feet of water have been consumed since the meter’s installation. The flow rate tells you how many gallons are flowing through the meter at any given moment.
Shut-Off Valve
A home plumbing system might seem complex and intimidating, but it works mostly on basic principles like gravity and water pressure. Understanding just a few key concepts will help you navigate this intertwined network like a pro.
A good place to start is by familiarizing yourself with the location and function of your house’s shut-off valves. There is one that shuts off the supply to your entire house, and you may also have individual fixture valves (with twistable handles or knobs) that allow you to work on a single toilet or sink without closing the main valve for the whole house.
There are many different types of shut-off valves, but the most common ones are gate valves and ball valves. Both feature an internal “ball” or “hub” with a hole in it that pivots into a straight or perpendicular position to open and close the valve. These valves are usually soldered or solvent-glued onto copper pipes, and they can either be “normally open” or “normally closed.”
Most drain-waste systems feature a separate clean-out plug that you can open to clear out stubborn clogs without opening your main drain pipe. These are typically found in the basement, but sometimes in other parts of the house as well.
If you’ve been following the news, you may have heard about the YouTube video that went viral a few years back of a handyman who forgot to turn off the main water shut-off before working under his kitchen sink to fix a leak. This simple mistake resulted in a ferocious 90 PSI of hot water shooting out the bottom of the cabinet and flooding the entire apartment. By knowing where your shut-off valves are and how to use them, you can prevent similar mishaps.
When It’s Time For a Window Replacement
Ensure your Window Replacement Foxboro MA is square by measuring diagonally across the frame from corner to corner. Also, use a hammer and flat bar to remove the flashing, trim, and brick molding, which may be reused.

Open the weight pockets and remove the metal weights and cords; these can be recycled. Then, vacuum the rough opening and fill any voids with loose fiberglass insulation or low-expansion foam.
Windows account for about 25%-30% of the average home’s heat loss and energy usage. With escalating energy costs, window replacements are one of the best investments homeowners can make to reduce heating and cooling costs. Many window companies claim homeowners can recoup the cost of new energy-efficient windows in about seven years through savings on their energy bills. However, these claims are based on unrealistic assumptions and energy modeling, and are not necessarily indicative of real-life performance.
Energy efficient windows are made with insulated frames and low-emissivity glass to reduce the transfer of heat between indoors and outdoors. This helps to keep heat in during the winter and out during summer, saving energy by reducing the work your heating and air conditioning system must do to maintain a comfortable temperature.
When choosing new windows for your home, look for the Energy Star label and consider a variety of styles, sizes, shapes, colors and features to find the perfect fit for your design preferences and energy efficiency goals. Whether you’re installing in new construction or replacing existing windows, there are two types of replacement windows to choose from: full frame replacement windows and insert windows (also called pocket replacement windows). While both offer energy efficiency benefits, the type of window you install will impact how well it performs.
During window installation, professional installers ensure that the gap between the old and new windows is properly sealed and caulked to prevent drafts and energy leaks. They also check that the window fits correctly in its space and that it is level and plumb to prevent any unnecessary movement that could impact energy efficiency.
When replacing your windows, opt for double-pane or triple-pane windows that are insulated and have low-emissivity coatings. This will provide the greatest energy-efficiency and comfort. You can also save by installing windows that are ENERGY STAR qualified and stagger the project over several years to take advantage of a 30% tax credit, which is currently available through 2032.
While energy-efficient windows are a smart investment, homeowners would be wise to invest their money first in attic insulation and weatherstripping, which can achieve far more significant results than installing new windows. Plus, more heat enters and escapes through attic hatches, recessed light fixtures and fireplaces than through the windows, which make up only a small fraction of your total wall area.
Longevity
Windows are an important feature of your home, adding curb appeal and improving energy performance. However, like any home component, windows do not last forever. Eventually, they will wear out or break down, leading to air and water leaks, mold, wood rot and other issues. Watching for signs of deterioration can help you decide when it’s time to upgrade your windows.
The longevity of your replacement windows depends on a number of factors, including their material and proper installation. Poor installation can lead to a lack of insulation and other problems. In fact, it’s estimated that over 30 percent of a home’s heated and cooled air can leak out through inefficient windows.
Window frames also have a direct impact on the lifespan of your new windows. Vinyl windows, for example, can last decades when properly installed and maintained. They are also available in a variety of colors to match any home design. On the other hand, wood frames may need to be repainted and resealed regularly to prevent rusting and damage.
Composite frames are another option for those looking for a long-lasting frame. They are often made from a mix of materials, such as fiberglass and wood, making them both energy-efficient and durable. Fiberglass is particularly strong and can resist a range of temperatures. However, composite frames tend to be more expensive than vinyl and wood.
Another factor that impacts the lifespan of your windows is the climate in which you live. High humidity and extreme weather conditions can cause your windows to deteriorate more quickly than in areas with milder temperatures.
A final consideration is the age of your existing windows. If your windows are more than 20 years old, they may be in need of replacement. Older windows are more likely to develop leaks, which can result in water and mold damage as well as higher energy bills.
In addition, if your home is located in a historic district or if the existing windows are part of a landmark structure, you may need to get permission from the Landmarks Preservation Commission (LPC) before installing new replacement windows. In these cases, it is essential that you choose windows that are compatible with the original architectural style of your home.
Style
There is a vast array of window styles available today. These options, along with modern engineering and fabrication techniques, have greatly improved the durability and energy efficiency of windows. In fact, replacing old windows with new ones can almost always help homeowners improve the comfort of their homes while reducing heating and cooling costs.
Homeowners should consider replacement windows when their current windows are damaged or in poor condition. Especially in older homes, single-pane glass or poorly fitting frames and sashes can contribute to water leaks, humidity problems and insect infestations. In addition, cracked windowpanes and rotting frames, sills or sashes can compromise the overall integrity of a house.
In many cases, window replacement can be done without affecting the existing exterior trim or interior wall surfaces of a home. This is known as insert window replacement, also called frame-in-frame installation. This style of installation can be a great way to preserve the original style and architectural character of a house or to accommodate special design features such as arches, circles, hexagons or octagons.
Insert windows can be installed in place of existing window sashes, operating hardware and covers. However, if the existing frame, trim and siding are in poor condition, it may be necessary to use full-frame replacement, or “new construction” windows. These types of replacement windows require removal of the old sash, frame and trim and are best suited for brand-new construction or adding rooms to a new or existing home.
Some of the most common replacement windows are single hung, double hung or casement windows. These are easy to install and work well in most homes. Block frame windows are another option. These windows don’t have a nail fin or brick mold and fit directly into the existing window opening. They’re a good choice for vinyl or brick construction as they easily match the look of those materials.
Finally, there are specialty windows that can be custom-ordered to meet the needs of a particular home or to complement a specific style. These include bay and bow windows, garden windows, awning and casement windows. Some of these windows can take up to 12 weeks to be delivered after the order is placed, but most are in stock and can be installed relatively quickly.
Warranty
When looking for a window replacement company, be sure to ask plenty of questions about their products and warranties. Any reputable company should be more than happy to answer your questions in an honest and transparent manner. If a company does not seem to have the answers you need, it may be time to look elsewhere.
A good window warranty should cover each component of the windows. This includes the frame, glass, and hardware. It should also include installation and labor. It should also be transferable if you decide to sell your home. If your window upgrades add value to your home, this feature could be especially valuable.
Different companies have different warranties. You should look for a manufacturer-backed, limited lifetime warranty or double lifetime warranty. These types of warranties typically offer the most robust coverage. They often include a transferable warranty that can be transferred to the next homeowner. However, these warranties usually have stipulations, such as only covering a fraction of the cost for non-original owners.
You should also look for a warranty that covers the glass and hardware. This is particularly important for energy-efficient windows that use inert gases to keep air in and heat out. These gases deplete over time, so a warranty that covers this is important. A reputable window company should be able to tell you how quickly these gases are expected to deplete.
Some companies may also offer their own workmanship warranty in addition to the manufacturers’ warranty. This can provide extra peace of mind that you’re working with a reputable and knowledgeable window company. This is especially true if the installer has any extra credentials from the manufacturer, such as being a master or elite installer.
In addition to looking at the length of the warranty, you should also read through the terms and conditions carefully. It is important to understand what a “lifetime” warranty actually means. Some manufacturers will only guarantee the quality of certain parts for a specified period of time, while others will include normal wear-and-tear in the definition of lifetime.